Soldering Basics

Beginner's Guide to Electronics Hand Soldering
Soldering is a core skill in electronics assembly, used to create reliable electro‑mechanical connections between components. The procedure outlined here focuses on the basics of hand soldering, using a traditional soldering iron — the most common starting point for beginners.
Safety First
Home Soldering Safety Recommendations
Basic Recommendations:
-
Wear safety glasses to protect against solder splatter.
-
Use a heat-resistant mat or surface.
-
Never touch the soldering iron tip—it's extremely hot (up to 400°C/750°F).
-
Always place the iron in its stand when not in use.
-
When clipping component leads hold the lead in place so it will not go flying and potential hit someone in the face or eye.
-
Wash your hands thoroughly after soldering, especially if using lead-based solder.
-
Work in a well-ventilated area or use a fume extractor/fan to blow fumes away.
-
Avoid eating in your workspace.
-
If you’ve performed any electrical testing, always make it a habit to double‑check that the power source is disconnected before returning to soldering.
.png)
The Science of Soldering-Best Practices

Soldering Basics
The best way to learn hand soldering is by first understanding the underlying science—it helps you create reliable joints. Soldering bonds metals at the atomic level, forming what’s known as an intermetallic connection. This produces a strong mechanical bond and a low-resistance electrical path between components.
When a solder joint is described as ‘wetted,’ it means the molten solder has flowed smoothly onto the component’s metal surface—whether base metal or plating—and formed an intermetallic bond at the atomic level. In this process, the solder and component metals have fused together, creating both a strong mechanical bond and a reliable electrical connection.
Electronics solder: What is it
Solder is a soft metal alloy that melts at low temperatures (typically 180–230 °C), allowing electronic parts to be joined safely without heat damage. It is available in several forms: wire (with or without a flux core), solder paste (a mixture of powdered solder alloy and flux), bars, pellets, and other forms for specialized applications/processes, such as those used in resistance soldering.
Most Common Solder Alloys for Electronics
Leaded Solder
-
(e.g., Sn63/Pb37 – 63% tin, 37% lead)
-
Melting point: ~183°C (361°F) — easy to work with.
-
Flows easily, creates shiny, smooth joints.
-
Forgiving for learners—highly recommended to start with.
-
Restricted in commercial products (RoHS) due to lead toxicity but widely available for hobby, prototyping, and repair. Use good ventilation and wash hands.
Lead‑free solder
-
Common alloy: SAC305 (~96.5% tin, 3% silver, 0.5% copper).
-
Melting point: ~217–220°C (423–428°F) — needs more heat.
-
Cheaper option: SnCu (99.3% tin, 0.7% copper), ~227°C (441°F).
-
Pros: Required for most new consumer electronics; safer for people and environment.
-
Appearance: Joints may look duller but are strong with good technique.
What oxidation is
Oxidation is the chemical process all metals undergo when exposed to oxygen in the atmosphere, forming a surface oxide layer. During soldering, the heat of the iron accelerates this reaction, so fresh oxides can form quickly if nothing stops them. This oxide layer acts like a barrier — it prevents solder from wetting the surface because molten solder cannot bond directly to oxides. That’s why old or tarnished copper looks dull or dark: it’s covered in copper oxide.
What is Flux
Flux is a chemical cleaning agent that:
-
Removes existing oxides from the metal surface.
-
Prevents re‑oxidation while the joint is hot.
-
Improves wetting, allowing molten solder to spread smoothly and bond properly. Without flux, solder would simply bead up and fail to make a reliable electrical or mechanical connection.
Flux Basics
For hand‑soldering operations, flux is supplied either as a liquid, usually applied with a brush or by dipping for tinning, or as solder wire with a built‑in flux core. Flux‑core solder wire is the preferred choice for most hand‑soldering tasks because it is easy to use, requires no additional application steps, and continuously cleans the metal surfaces by removing oxides during soldering. While solder paste (a mixture of powdered alloy and flux) is widely used in automated reflow processes, it is less common to be utilized in hand‑soldering with a tradional soldering iron.
What Is Flux Made Of
Flux for electronics is usually formulated from:
-
A base of rosin (from pine sap) or synthetic resin.
-
Mild organic acids/activators (often halide‑free) that chemically dissolve oxides.
-
Solvents (such as alcohol) to carry the flux and help it evaporate cleanly.
-
Small amounts of surfactants to improve spreading.
Fluxes come in a variety of types, each with different levels of activity (how aggressively they remove oxides) for different cleaning requirements.
Rosin Flux
-
Leaves an insulating residue that is generally non‑corrosive.
-
Residue can be cleaned if desired, but often it is safe to leave in place.
No‑Clean Flux
-
Definition: A low‑solids mildly activated flux formulated to leave minimal, non‑conductive, non‑corrosive residue that can remain on the assembly without cleaning in most applications.
-
Typical composition: Reduced resin/rosin content, weak organic acid activators (mild and halide‑free), and fast‑evaporating solvents. The tiny residue polymerizes into a hard, inert film.
-
When to clean anyway: High‑reliability assemblies (medical, aerospace), fine‑pitch/high‑impedance circuits, or where cosmetics and conformal coating adhesion matter.
Water‑Soluble Flux
-
Primarily used in mass soldering applications. Not recommended for most hand‑soldering, as it requires an aqueous cleaning system.
-
Uses stronger organic acids as activators, giving it high activity.
-
Very effective at removing oxides and improving wetting, especially on difficult surfaces.
-
Residue: Conductive and corrosive if left in place — assemblies soldered with water‑soluble flux must be thoroughly cleaned with DI-water after soldering.
Levels of Flux Activity
Fluxes are sold in different “activity levels,” which describe how strong their cleaning action is:
-
Low‑activity flux (No‑Clean, pure rosin): Gentle, leaves very little or safe residue. Best for clean, shiny component leads and pads. Residue usually doesn’t need to be cleaned.
-
Medium‑activity flux (RMA – Rosin Mildly Activated): A balanced option. Strong enough to clean light oxidation but still leaves non‑corrosive residue, which doesn't require cleaning in most cases. Great for hobby kits and general electronics soldering.
-
High‑activity flux (RA – Rosin Activated, or water‑soluble): Very aggressive cleaners. They handle heavily oxidized or difficult surfaces, but the residue is corrosive or conductive, so you must clean the board afterward. These are usually for industrial assembly, not beginners.
Key Point on Activity
-
Low‑activity fluxes (like no‑clean) are gentle, leaving safe residues.
-
Medium‑activity fluxes (like rosin) balance cleaning power with non‑corrosive residues.
-
High‑activity fluxes (like water‑soluble) clean extremely well but require mandatory post‑solder cleaning.
Beginner tip
For learning, Sn63/Pb37 solder used with RMA (Rosin Mildly Activated) flux is recommended as it forgiving and easier to work with than lead-free solder. While leaded solder is restricted in new consumer electronics under RoHS regulations, it remains available for hobby projects, repair, and prototyping. RMA flux does not require cleaning after soldering, which simplifies assembly and avoids generating hazardous waste from the cleaning process. Once you are comfortable, switch to lead‑free solder to match modern devices. Always follow safe handling practices when working with leaded solder.
Important reminder
Use rosin‑core solder for electronics. Avoid acid‑core/plumbing solder — it’s corrosive and can damage components.
Rosin Flux Cleaning/Removal:
Why It’s Not Recommend for Hobbyists Working at Home
Should You Clean Rosin Flux Residue at Home?
Rosin flux is generally safe to leave on soldered electrical connections — whether on circuit boards, wires, or terminals — except in critical or high‑performance applications. Because it is non‑corrosive, the residue does not affect functionality in most hobbyist projects. In fact, attempting to clean flux at home often creates unnecessary hazardous and environmental waste. Proper cleaning requires chemical solvents, which carry risks of chemical poisoning through skin contact, inhalation, or accidental ingestion. Safe cleaning also demands personal protective equipment, adequate ventilation, and proper hazardous waste disposal — resources that are typically not available in a home environment.
Why Cleaning at Home Is Problematic
-
Chemical handling: Isopropyl alcohol and other solvents are flammable and can irritate skin and eyes.
-
Ventilation: Professional labs use fume hoods; most home workspaces don’t.
-
Waste disposal: Solvent‑soaked wipes and flux residues must be treated as hazardous waste — not something you can safely throw in household trash or pour down the drain.
-
PPE requirements: Gloves, goggles, and protective clothing are essential, but often overlooked in hobby settings.
When Cleaning Is Necessary
-
Professional inspection standards (e.g., IPC compliance).
-
Preparing for conformal coating (flux residue can interfere with adhesion).
-
Aesthetic or cosmetic reasons (customer‑facing products).
Safer Alternatives for Hobbyists
-
Accept that rosin flux residue is normal and safe in most home projects.
-
Use no‑clean flux formulations, which are designed to leave minimal, non‑conductive residue.
-
Focus on good soldering technique to minimize excess flux in the first place.
Soldering Tip Recommendations
The main difference between soldering tip types is how their geometry controls heat transfer. A tip’s shape determines its ability to focus heat on the intended joint without inadvertently affecting nearby connections, while also maximizing physical contact with the components for effective heat transfer and efficient soldering.
For most modern circuit board electronic components, I recommend using a conical soldering tip. It's fine point provides precise control, making it easier to solder pads and leads cleanly without applying excess heat or solder. This shape is versatile enough to handle both small surface‑mount parts and standard through‑hole connections, ensuring reliable joints across a wide range of assemblies.
Common Soldering Tip Types and Their Uses
Conical - Tapers to a Fine Point

Best Uses: For most general electronics, precision soldering on small pads, fine wires, or tight spaces
Excellent for accuracy, but slower heat transfer on larger joints
Chisel - Flat, Wide Face
Best Uses: General PCB soldering, through‑hole components, wire connections, lugs, and large ground planes.
Hoof (Bevel) - Curved, hollowed tip with a “reservoir”
Best Uses: Drag soldering IC pins, applying solder across multiple pads. Holds solder for continuous flow; ideal for fine‑pitch components.

SOLDERING EQUIPMENT RECOMENDATIONS
Choosing the Right Soldering Iron for Your Solder Type
For best results, use a soldering iron with adjustable temperature control. This feature lets you fine‑tune the heat for different solder alloys, component types, board designs, and soldering tasks.
Types of Soldering Irons
2-Prong Direct Plug-In Soldering Iron
Direct Wall Outlet Connection with Temperature Control
(No Grounding or Electrical Isolation)

Introduction
When it comes to soldering, equipment generally falls into two main categories: 2‑prong direct plug‑in soldering irons, which provide no electrical isolation, and 3‑prong soldering stations, which include an earth ground and isolation transformers for added safety. Both types are available either with or without temperature control, adding another layer of distinction for users to consider.
2-prong soldering irons, without an earth ground, or isolation transformer (like the one pictured above) are often chosen for their low cost and simplicity. They plug straight into a wall outlet and can be a budget‑friendly option for casual use. However, these irons come with notable limitations. Unlike 3-prong soldering stations, which have an earth ground, and provide electrical isolation from the mains, as well numerous other advantages, over low-cost 2-prong plug‑in iron, which lack critical safety features and durability.
Two‑prong soldering irons are never used in professional electronics manufacturing because they pose serious electrical, fire, and burn hazards. Without an earth ground or electrical isolation, they are unsafe for beginners, young learners, students, or most hobbyists. Their use should only be considered in very limited situations — for example, when making just a few simple electrical connections where the cost of a soldering station cannot be justified, or by experienced field technicians who understand the risks and have the skills to manage them safely.
Soldering stations, by contrast, offer better protection for both the user and sensitive electronic components, making them the safer and more reliable choice for educational and long‑term projects.
Basic Low-Cost Soldering Irons Characteristics
No Grounding:
-
Basic soldering irons that plug directly into a 120V or 220V wall outlet often lack a ground prong. Without grounding, there is a risk that the user could receive an electrical shock if there's an issue with the iron's wiring or if the device becomes faulty.
-
Since there's no direct path for stray current to safely flow to the ground, it can accumulate in the device, and in the event of a malfunction or a short circuit, the user may be exposed to electrical hazards.
No Isolation:
-
Without an isolation transformer, the plug-in soldering iron is directly connected to the wall outlet. This means that if there’s a power surge or other electrical malfunction, the iron could potentially carry that surge directly to the user. This increases the risk of an electrical shock and poses a safety hazard.
-
The lack of an isolation transformer also means the iron can transmit fluctuations or interference from the power supply directly into your work, which can be problematic when working on sensitive electronic components or circuits.
Advantages:
-
Simplicity and Cost: These soldering irons are simpler and cheaper because they lack advanced safety features like grounding or isolation. They are ideal for hobbyists who perform occasional soldering on less sensitive projects.
-
Portability: Being more compact and lightweight, these irons are easier to move around, but that’s more of a convenience factor than a safety advantage.
Recommended Soldering Equipment:
Station Type

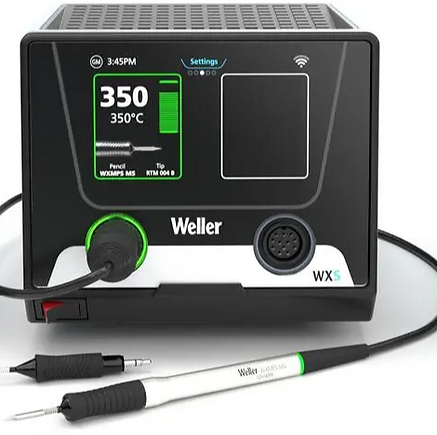
Temperature‑Controlled Soldering Station with 3‑Prong Plug & Holder
If you plan to do a significant amount of soldering at home or intend to use your soldering equipment for the long term, investing in a Soldering Station is a far better choice than using traditional soldering irons that plug directly into a wall outlet and lack a ground plug.
Soldering stations are designed for industrial use and offer superior performance and safety, while basic soldering irons are typically used by beginners or hobbyists for one-time or occasional tasks, and often at a lower price point.
In the electronics industry, soldering stations with isolation transformers and grounded plugs are the standard, as opposed to basic soldering irons that plug directly into wall outlets. Soldering stations offer significantly better electrical isolation and protection, minimizing the risk of electrical shock or damage—features that traditional soldering irons lack.
Additionally, the electrical cords of soldering stations are often made from heat-resistant materials designed to withstand burns or melting, even if the soldering iron tip accidentally touches them. In contrast, the cords of basic soldering irons are typically not heat-resistant and can quickly melt down to the electrical conductor if contacted by the hot tip.
Also, most Soldering Stations feature precise temperature control with digital displays, allowing you to maintain the exact heat required for different soldering tasks. This is especially beneficial when soldering components to large ground planes or other heat-sensitive materials, as soldering stations provide more consistent and stable heat when needed.
Soldering stations are typically built for industrial use, making them more durable and robust compared to basic soldering irons that plug directly into a wall outlet. This added durability ensures they can withstand prolonged use and deliver better performance over time.
Soldering Station Features
Safety with Grounding:
-
Soldering stations typically have a grounded plug (three-prong plug with a ground wire) which ensures that the soldering iron is safely grounded. This significantly reduces the risk of electrical shock to the user, in the event of faulty equipment.
-
The ground connection also helps in preventing damage to sensitive electronic components by minimizing electrostatic discharge (ESD). ESD can be harmful to sensitive electronic parts, and grounding helps protect them from accidental static buildup.
Isolation Transformer:
-
Many soldering stations are equipped with an isolation transformer, which separates the user and the equipment from the power supply, offering another layer of safety. This transformer provides electrical isolation between the device and the main power grid, reducing the risk of direct electrical contact with high-voltage components.
-
An isolation transformer is particularly important for sensitive projects, like working with microelectronics or other low-voltage components.
Enhanced Safety for Extended Use:
-
If you're doing extended soldering sessions, the isolation and grounding features in a soldering station provide safer operation over time. The iron's heating element is less likely to cause accidental shock or malfunction, which is crucial for professionals or anyone doing complex work regularly.
Advantages:
-
Improved safety: The ground and isolation transformer reduce the risk of electrical shock and protect the user from electrical hazards.
-
Prevents damage: Grounding reduces the risk of electrostatic discharge (ESD) damaging sensitive components.
-
Stable, safe operation: The isolated transformer offers protection from power surges, ensuring stable and consistent performance.
Soldering Station Verses Soldering Iron Key Comparison:
Soldering Station (With Ground & Isolation Transformer)
Grounding
Yes, reduces electrical shock risks.
Isolation Transformer
Yes, protects user from power
surges and electrical faults.
Electrostatic Discharge (ESD)
Helps protect sensitive components.
Safety
Safer for extended use and sensitive work.
Plug-In Soldering Iron (No Ground, Direct Wall Outlet)
Grounding
No, increases electrical shock risk.
Isolation Transformer
No, direct connection to the wall outlet increases risk.
Electrostatic Discharge (ESD)
No grounding, higher risk of ESD damage to components.
Safety
Less safe, more potential for burn, shock, fire or damage.
Safety Recommendation
If you decide to purchase or already own an inexpensive 2‑prong soldering iron, it is strongly recommended that you also use a soldering iron stand for safety and convenience.
Low-cost soldering irons that plug directly into a wall outlet often come with inexpensive plastic soldering iron holders. These holders, due to their cheap design, typically do a poor job of securely holding the iron, making them unsafe and prone to tipping over.

To improve safety and stability, consider purchasing a more durable soldering stand. Look for a sturdy, metal stand that provides a stable base and secure positioning for the iron. Many affordable options are available that can greatly enhance the overall experience and prevent accidents. Investing in a reliable stand will ensure that your soldering iron remains safely in place while you work.
Soldering Equipment:
Optimal Tip Temperatures for Different Solders

Matching Fixed-Temperature Irons with Solder Types
If your iron does not have temperature control, it’s essential to match the solder to the iron’s fixed operating temperature. Leaded solder melts at a lower temperature ~183°C (361°F), so it pairs well with irons set around 315–343 °C. Lead‑free solder requires more heat ~217–220°C, so it works best with irons that run hotter, around 350–380 °C. Using the wrong combination can result in cold joints or burnt flux, and over-heated solder joint, so always check your iron’s manufacturer specifications and choose the solder that fits your iron.
Recommended Soldering Iron Tip Temperatures
-
Leaded solder (Sn63/Pb37 or Sn60/Pb40): Suggested tip temperature is 315–343 °C (600–650 °F). This range provides enough heat for proper wetting while minimizing the risk of damaging components.
-
Lead‑free solder (e.g., SAC305): Requires a higher setting, typically 343–371 °C (650–700 °F). For boards with large copper planes or high thermal mass, temperatures may need to be increased up to 380 °C.
Balance Temperature and Contact Time - Typical Guidance
-
Rule of Thumb: Use the lowest temperature that achieves good wetting within 1–3 seconds. Normal dwell time usually 1–3 seconds per joint is enough, if the iron is at the correct temperature, and the surfaces are properly prepared.
-
Avoid Overheating: Excessive dwell time (typically more than 5 seconds) or too high a soldering tip temperature can lift pads, damage components, and shorten soldering iron tip life.
-
Why it matters:
-
Too high temperatures can cause PCB pads and traces to delaminate.
-
Components (especially semiconductors and LEDs) can be thermally damaged.
-
Over-heated, burnt flux can cause poor wetting and unreliable joints.
-
The iron tip itself oxidizes faster, shortening its life.
-
Hand Soldering Temperature Guidelines
for Common Components
When soldering by hand with a soldering iron, it’s important to respect the maximum temperatures and dwell times recommended by component manufacturers. Staying within these limits prevents pad lifting, component damage, and poor joint reliability.
Resistors (through‑hole)
-
Hand soldering tip temperature: 315–343 °C (with leaded solder) or 350–380 °C (with lead‑free solder)
-
Dwell time: ≤10 seconds
-
Risk: Excess heat can shift resistance values or crack the coating.
Electrolytic capacitors
-
Hand soldering tip temperature: 315–380 °C depending on solder type
-
Dwell time: ≤5 seconds
-
Risk: Heat may dry out or damage the electrolyte.
Diodes (through‑hole or SMD)
-
Hand soldering tip temperature: 315–380 °C
-
Dwell time: ≤10 seconds
-
Risk: Junction degradation if overheated.
Chip resistors and capacitors (SMD)
-
Hand soldering tip temperature: ≤350 °C
-
Dwell time: ≤3 seconds
-
Risk: Pad lifting or cracking if overheated.
LEDs (through‑hole or SMD)
-
Hand soldering tip temperature: 315–380 °C
-
Dwell time: ≤5 seconds
-
Risk: Heat can damage the epoxy lens or reduce light output.
Integrated circuits (SOIC, QFP, BGA, etc.)
-
Hand soldering tip temperature: ≤350 °C
-
Dwell time: 3–5 seconds per pin
-
Risk: Excess heat can warp the package or damage bond wires.
Key Points for Hand Soldering
-
JEDEC J‑STD‑020 defines industry standards for SMT components, with peak reflow temps up to 260 °C for lead‑free soldering.
-
Hand soldering guidance is usually stricter: manufacturers often recommend ≤350 °C tip temperature and ≤3–5 seconds dwell time per joint.
-
Leaded solder melts at ~183 °C → irons set around 315–343 °C are sufficient.
-
Lead‑free solder melts at ~217–227 °C → irons set around 350–380 °C are typical.
-
Excessive dwell time (more than ~5 seconds for most components) risks damage.
-
Always check datasheets for exact hand soldering limits, especially for sensitive parts like LEDs and electrolytic capacitors.
Soldering Iron Preparation- Tinning Process Steps

Tinning Your Soldering Iron Tip
-
Power On and Heat Up Turn on your soldering iron and allow it a few minutes to fully heat up to the appropriate soldering temperature.
-
Test the Tip Temperature Apply a small amount of solder to the tip. It should melt almost instantly—this confirms the iron is hot enough for soldering.
-
Tin the Tip Coat the tip with solder until a noticeable layer forms. This process is called tinning and helps improve heat transfer.
-
Clean the Tip Wipe the soldering iron tip across a damp sponge to remove excess solder. Drag the iron along the sponge until the surface looks clean and shiny, making sure to clean all sides of the tip.
-
Repeat as Needed Repeat the tinning and cleaning process as many times as necessary until the tip has a smooth, shiny finish—like it's been lightly painted with solder, but without any excess buildup.
When to Replace a Soldering Iron Tip
If you cannot restore a clean, shiny surface on the soldering iron tip after numerous attempts at wiping and re‑tinning, there are two likely causes:
-
Insufficient heat – The soldering iron may not be reaching the proper temperature to melt the type of solder you’re using. This can happen if the temperature setting is too low, the solder alloy requires more heat than the iron can provide, or a component of the iron is defective.
-
Tip wear – over time, tips can become pitted or rough, preventing solder from wetting properly.
Inspect the tip closely. If you see pitting, corrosion, or a rough surface, it’s a sign the tip is worn out and should be replaced. A fresh tip ensures proper heat transfer, clean joints, and easier soldering.
The Mechanics of Soldering
Tip Tinning vs. Joint Soldering:
Know the Difference- What You Shouldn't Do
Soldering Iron Tips Are Heaters,
Not Paintbrushes


Why Soldering Is Not Like Painting
Soldering is not like painting, where you load paint onto a brush and spread it onto a surface. A soldering iron is not meant to carry solder to the joint — it is designed to heat the component leads and pads to soldering temperature (~190–200 °C) and to draw away some excess solder from the solder joint.
Why Directly Melting Solder on the Iron Tip and Carrying It to the Joint Doesn’t Work
Many beginners — myself included when I first started soldering over 50 years ago as a teenager — make the common mistake of melting solder onto the iron tip and then trying to carry it to the joint. While it might seem like a good idea, this method cannot produce a proper solder joint. Here’s why:
The soldering iron runs much hotter than the actual wetting temperature of solder. For example:
-
Iron tip temperature: ~320–380 °C
-
Joint wetting temperature: ~190–200 °C (leaded), ~230 °C (lead‑free)
If you apply solder directly to the tip and then try to carry it to the joint:
Step‑by‑Step Breakdown
-
Solder wire (flux‑core) touches the hot tip
-
The flux inside the solder activates instantly.
-
It briefly cleans the tip surface, allowing solder to wet and adhere.
-
-
Flux burns off almost immediately
-
At tip temperatures (~350–380 °C), flux evaporates or carbonizes in seconds.
-
What’s left is burnt flux residue mixed into the molten solder.
-
-
Rapid oxidation begins
-
The exposed solder on the tip reacts with oxygen in the air.
-
Oxide layers form quickly at high temperature.
-
-
Resulting mixture
-
You now have solder contaminated with burnt flux residue and oxides.
-
This degraded solder is dull, dirty, and no longer flows or wets properly.
-
Why This Method Always Fails
-
By the time you move the iron to the joint, the solder is already degraded.
-
The flux needed to clean the joint surfaces is gone, so proper wetting is impossible.
-
Even if you add more solder and flux at the joint, the overheated solder you carried is essentially unusable “trash.”
-
That overheated solder contaminates the joint with oxides and burnt flux residue, reducing bond strength and electrical reliability.
Step-by-Step Guide-
The Correct Method of Hand Soldering Electrical Components
When soldering components to each other or to a circuit board pad, place the iron’s tip so it touches both the component lead (electrical contact) and the pad at the same time. This ensures the iron is heating all surfaces to be soldered simultaneously, and they will reach soldering temperature together.
Dwell time: Hold the tip in place for about 1–2 seconds (long enough for the joint to reach soldering temperature, but not so long that you risk damaging the pad or component).
Next, feed a small amount of solder into the point where the iron tip meets the components. The solder will melt, flow, and coat the surfaces, forming a solid electrical and mechanical connection. You control the amount of solder by how much wire solder you feed into the joint. Once the pad and lead are covered with molten solder, remove the iron and let the joint cool, and solidify.
Pro Tip: Although the rule of thumb is to apply solder to the joint surfaces (not directly to the iron tip), professionals will in practice almost always add a tiny amount of solder right at the point where the tip–joint interface. This creates a thin molten bridge that dramatically improves heat transfer compared to dry metal-to-metal contact alone.
The key is balance:
-
Too little solder → poor wetting, weak mechanical and electrical connection.
-
Too much solder → messy joint, difficult inspection, and possible quality issues.
Learning the right amount takes practice, but a properly soldered joint should be smooth, shiny, and just enough to cover the pad and lead or other electrical contact terminal without excess buildup.
Surface Tension and Solder Behavior
Molten solder, like any liquid, is subject to surface tension. When you withdraw the iron from a molten solder joint, some solder naturally clings to the tip and is pulled out of the joint.
If a joint has too much solder:
-
Clean the iron.
-
Reheat the joint to reflow solder.
-
Add a small amount of flux-core solder (to refresh flux and improve wetting).
-
Withdraw the iron to let surface tension pull solder away.
Repeat as needed. For heavy excess, use solder wick (desoldering braid) to absorb it.
Oxidation Dynamics- How Fast Oxidation Occurs
-
Immediate onset: As soon as the tip is heated and exposed to air, oxidation starts. Even a freshly cleaned tip will begin oxidizing within seconds.
-
Temperature dependence:
-
At ~300 °C, oxidation is slower but still noticeable within a few minutes.
-
At ~350–400 °C, oxidation accelerates, and a tip can lose wetting in under a minute if not tinned.
-
-
Surface condition: A tip that is properly tinned with fresh solder resists oxidation longer because the solder layer shields the metal.
-
Flux protection: Flux in solder wire actively removes oxides during use, slowing buildup. Without flux, oxidation progresses much faster.
Maintaining the Soldering Iron Tip During Soldering
A clean, well‑tinned tip is essential for consistent heat transfer and reliable joints. Oxidation and excess solder build up quickly, so wiping the tip on a damp sponge is critical.
This serves two purposes:
-
Removing excess solder left behind on the tip during the soldering process.
-
Maintaining a well‑tinned, oxide‑free surface for the best heat transfer and reliable solder joints.
In fact, roughly one‑third of your soldering time should be spent cleaning the iron’s tip. Out of every minute at the bench, about 20 seconds should be devoted to wiping the tip on a damp sponge to keep it free of oxidation and excess solder.
For beginners, this practice is even more critical: clean the tip after completing every single joint. A shiny, well‑tinned tip ensures proper heat transfer, consistent solder flow, and reliable connections.
It’s a continuous battle — the operator works to keep the tip clean and shiny, while oxygen in the air works to form a layer of oxidation that reduces performance. A clean, properly tinned tip is the key to consistent, high‑quality soldering.